
-
Navigate to the Test Suites panel from the Project Overview page
-
Click the "Add" button; an "Add Test Suite" dialog box will pop up
-
Specify "Name" and then click the "Add" button
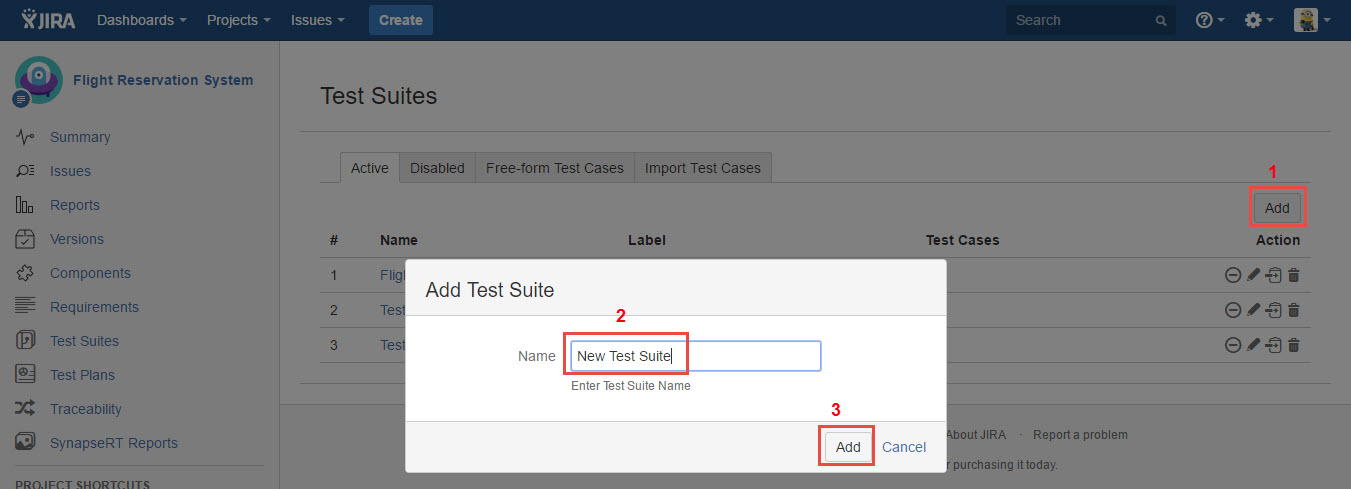
[Screenshot - UG0031_Test_Suite_Panel_Add_Test_Suite]
4. Once the Root Test Suite is added successfully, it will be present in the "Active" tab.
Note: Test Suites those are created and presented in 'Test Suites' home page are called 'Root Test Suite', it is to differentiate the Test Suites created inside any 'Root Test Suite'.
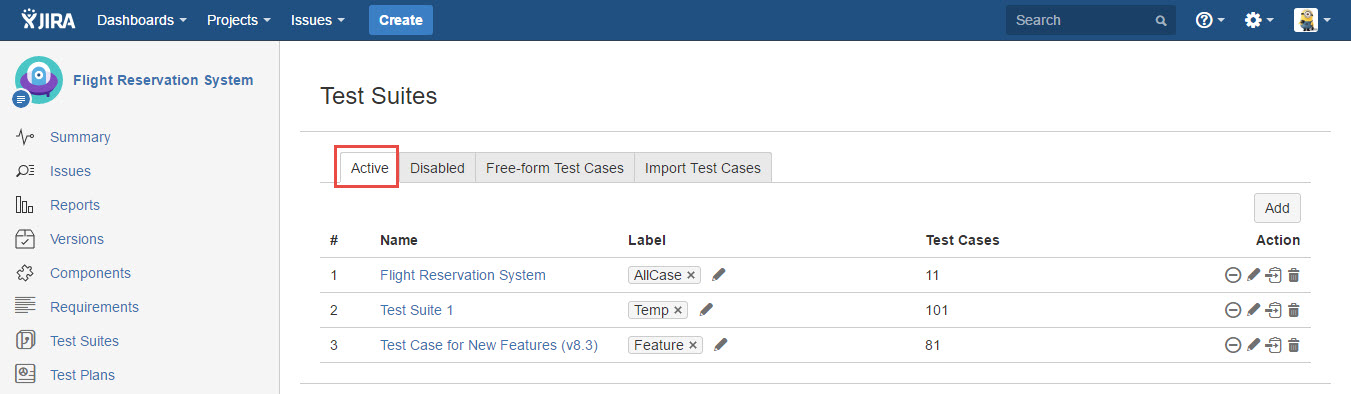
[Screenshot - UG0032_Test_Suite_Panel_List_Test_Suite]
5. You can update the Root Test Suite name and add a label to it by clicking the "Edit" button.
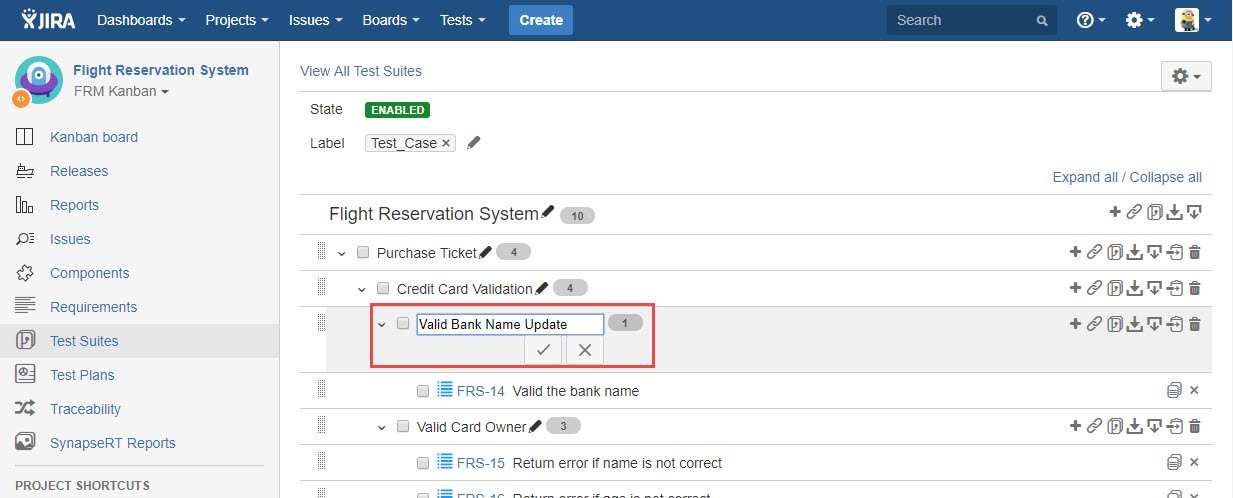
[Screenshot - UG0033_Test_Suite_Panel_Edit_Test_Suite]