Go2Group synapseRT displays requirements based on projects and releases, providing a comprehensive view into your entire development environment. Go2Group synapseRT provides a dashboard within JIRA to track requirements against specific releases. In addition, synapseRT displays charts related to specific requirements and due dates across projects.
Go2Group synapseRT for JIRA - Technical Documentation
Overview
Go2Group synapseRT displays requirements based on projects and releases, providing a comprehensive view into your entire development environment. Go2Group synapseRT provides a dashboard within JIRA to track requirements against specific releases. In addition, synapseRT displays charts related to specific requirements and due dates across projects.
By simply clicking on the Go2Group synapseRT link in the JIRA menu bar, the Go2Group synapseRT dashboard appears. From the dashboard, selecting a project and release from the dropdown menus and clicking the Query button displays the requirements data in a dashboard.
Additional functionality include drilling down on specific requirements / issues by clicking a requirement in the matrix. The information from that requirement / issue can be displayed by clicking on the defect link.
Architecture
Go2Group synapseRT leverages JIRA 6's architecture, including Google Gadgets and custom issue types, allowing all test management activity to be captured within JIRA.
Use Case
The Test and Development phases of the software development life cycle process are seen as key indicators to the success and efficiency of a product being available to the general public on time. Here's a usage scenario of how Go2Group synapseRT can add value to your workflow.
Questions Being Answered
-
What test case is associated with a requirement?
-
What defect is associated with a test case?
-
What is the requirement burndown chart?
-
How many defects are related to the requirement?
-
What's the relational matrix between requirements and test cases?
Use Case Example
-
Project manager defines a new version for project release.
-
Project manager/Quality Assurance (QA) creates requirements associated to the version and estimates the effort in time.
-
Project manager/QA creates test suites and test cases for each requirement.
-
QA team creates issues when the tests fail.
-
Project manager monitors the project in synapseRT dashboard using the traceability and planning tabs.
For more information, please review the Usage Guide.
Requirements
What's Needed
To successfully install and configure Go2Group synapseRT for JIRA 6, you will need to verify that you have satisfactory versions of several programs, and the appropriate permissions for installation and configuration.
Atlassian JIRA
-
The plugin is compatible with JIRA 6.0
-
Version 2.3 of the plugin is not compatible with JIRA version 3.x
-
Version 4.0 of the plugin is not compatible with JIRA version 4.x
-
For more information on Atlassian JIRA, please visit the Atlassian JIRA website at: www.atlassian.com
-
Java 6
-
Java is available from the Oracle website at: www.oracle.com
Administrative permissions
-
You will need access to the JIRA server
-
You will need administrative access to JIRA
In addition, before you read this guide, you should be familiar with the following JIRA concepts:
Where to Get Help
Go2Group provides support for its entire line of products by telephone, email, and a product-specific customer support ticket system:
|
By telephone |
877 442 4669 |
|---|---|
|
By email |
|
|
By ticket |
The support site above is self-administered - feel free to create and manage your account. For additional support information, please review the synapseRT for JIRA 6 support page.
For support with JIRA, please contact your Atlassian representative.
What's New in This Version
Go2Group is excited to announce the availability of version 6.x of Go2Group synapseRT for the latest version of JIRA! For a updates on versions, visit Recent Updates.
Installation
Installation Overview
This installation guide explains how to install the plugin using the provided installer. For details on manual installation, please contact us.
Installation Assumptions
Before you begin, please make sure that you have obtained:
-
Internet access during installation in order to download plugin installer within JIRA from Atlassian plugin Exchange.
-
A license key for Go2Group synapseRT. This can be generated using the plugin manager in JIRA.
-
Appropriate privileges for JIRA.
-
Privileges to install software on the JIRA server and restart the application.
Installation Steps for plugin Installation with Atlassian Plugin Exchange.
-
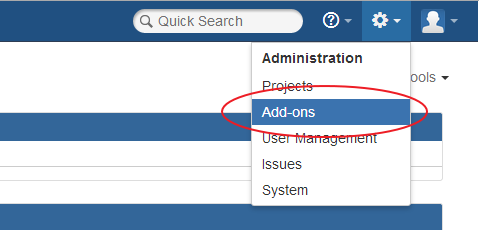
Login to JIRA as a system administrator. Click on the "COG" icon on the top right corner of the page and select Add-ons.
-
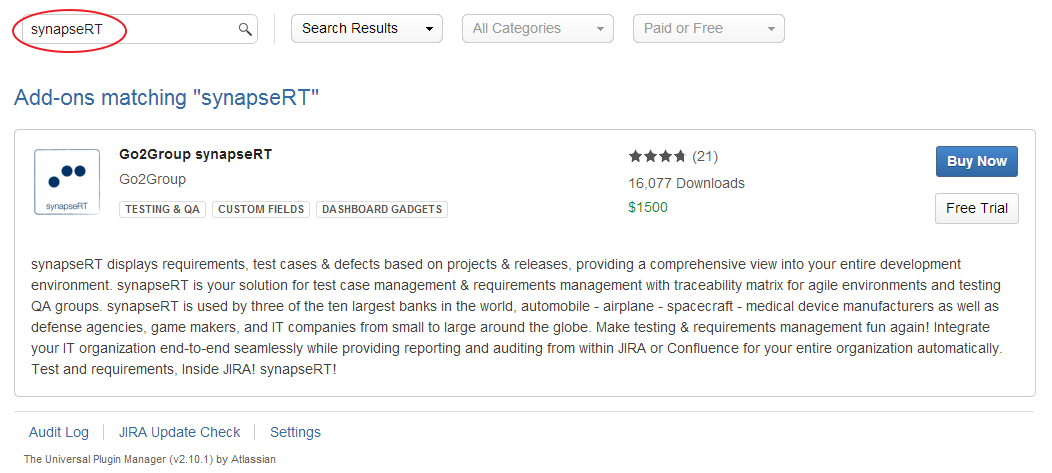
In the "Find new add-ons" page, search for synapseRT.
-
If you would like to try the plugin before your purchase, click on the "Free Trial" option to generate a 30 day trial license. If you would like to purchase the plugin, click on "Buy Now".
-
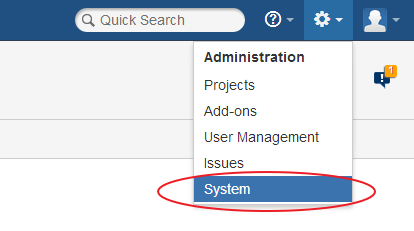
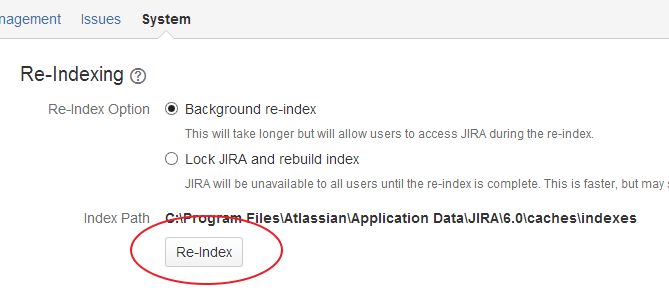
Once you have installed the plugin, you are required to perform a re-index of your JIRA instance. Click on the COG icon on the top right and select "System".
-
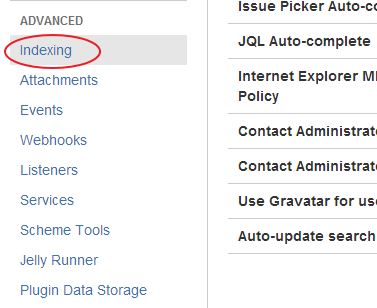
Look for the "Indexing" option under the Advanced options on the left menu bar.
-
Click on Re-index.
-
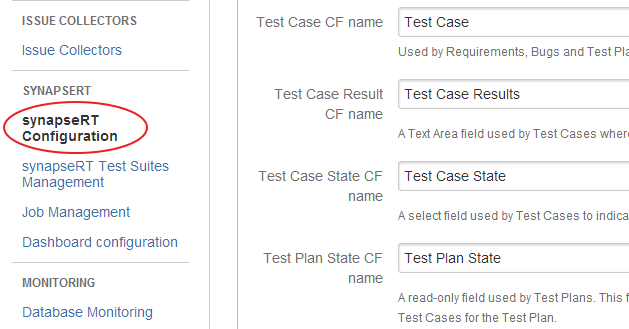
Your installation is complete. Go to the Add-ons menu in the administration page and you will see additional configuration options for synapseRT in the left menu bar.
synapseRT Configuration Options 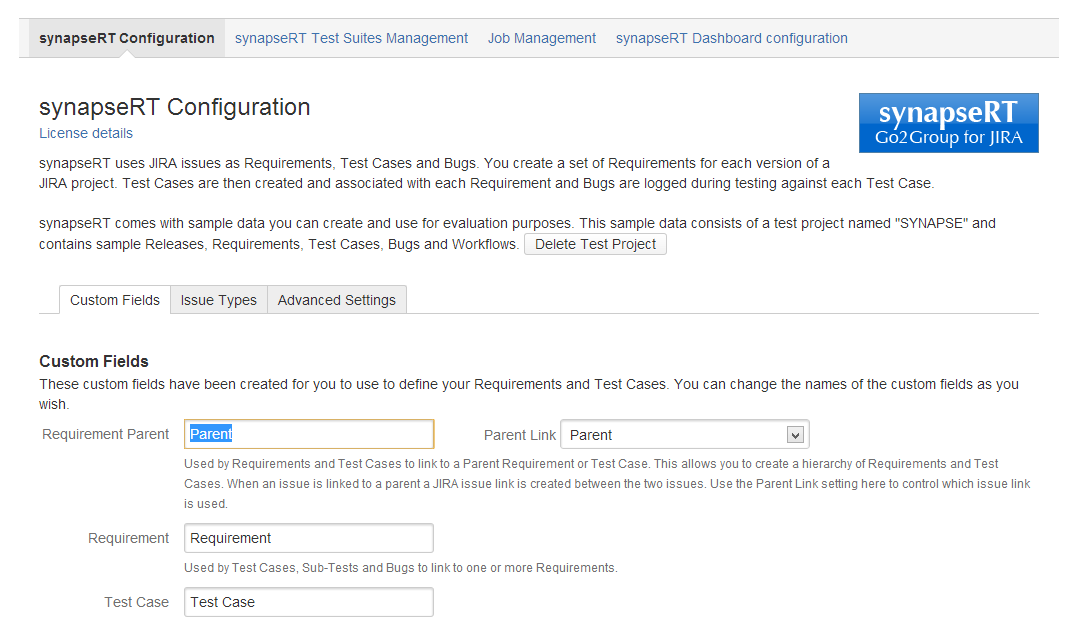
Configuration
Overview
The configuration of Go2Group synapseRT is straight-forward:
-
Add license key
-
Create custom fields
-
Create custom issue types
-
Create links
The following steps provide details for configuration Go2Group synapseRT.
Before continuing, please ensure you have administrator rights to JIRA!
Base configuration
The Go2Group synapseRT plugin configuration is automated. It automatically creates and enables required JIRA functions if they are inactive.
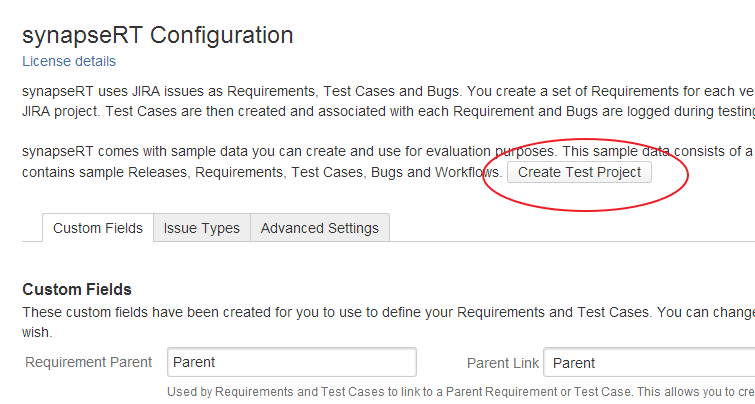
The synapseRT Configuration page will have the configuration created for you. But you have the option to edit the custom fields and issue types assigned to synapseRT.
|
Configure custom fields used by synapseRT |
|---|

|
|
Creating a test project
The synapseRT Configuration page also provides you with an option to create a test project. Simply click on the "Create Test Project" button. You can delete this project by using the "Delete Test Project" button on the same screen (only available if test project is already created).
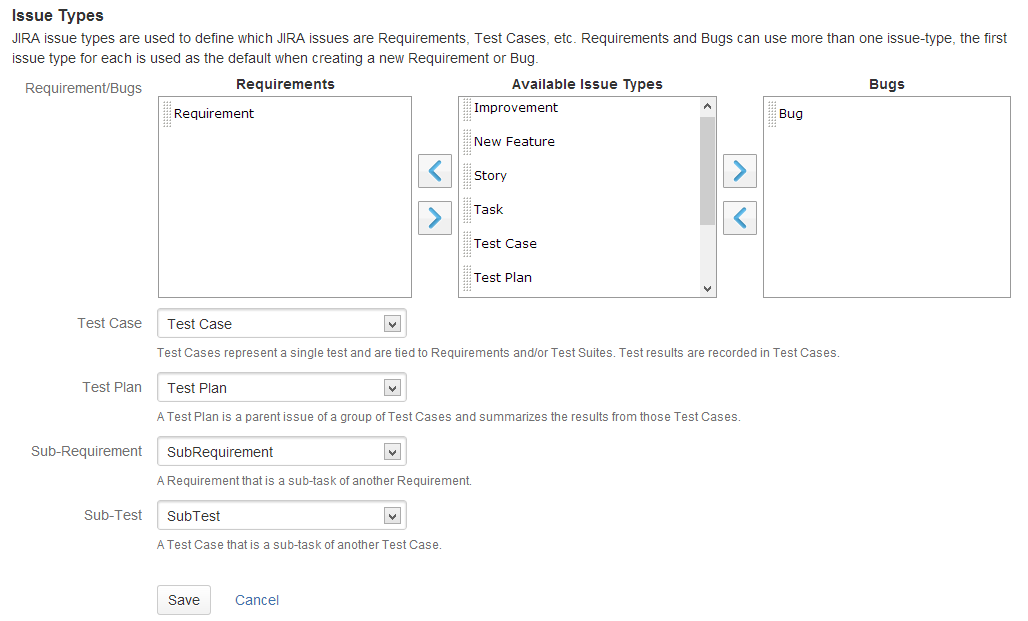
Configuring issue types
synapseRT basically uses 6 types of issues. The below table helps us understand the different types and how they are used.
|
Requirements, SubRequirements and bugs |
Requirements and bugs are issues reported. SubRequirements are subtasks to Requirements. |
|---|---|
|
Test cases and Sub-Tests |
A test case represents a single test case and is tied to requirement and/or test suite. A Sub-Test is a SubTask of a test case. A test suite is a group of test cases. |
|
Test Plans |
A test plan is a parent issue holding a group of test cases. It summarizes the result of each test case that belongs to the test plan. |
synapseRT comes with a default configuration for all the above issue types. But you can also configure the plugin to use issue types of your preference.
If you choose to use other issue types, please make sure the issue type is available in the project's issue type scheme. More information about issue type schemes can be found here.
Configuring custom fields
synapseRT plugin requires 7 custom fields to maintain the mapping between requirements, test cases, test plans and test suites. These custom fields are automatically created when you install the plugin.
|
Parent Custom Field and Parent Link |
Parent custom field is used by requirements and test cases to link to a parent requirement or test case. This allows us to create a hierarchy of requirements and test cases. When a requirement or test case is linked to it's parent, a JIRA issue link is also created. The type of link is determined by the Parent Link. |
|---|---|
|
Requirement Custom Field |
Used by Test Cases, SubTests and Bugs to link to one or more requirement. |
|
Test Case Custom Field |
Used by Requirements, Bugs and Test Plans to link to one or more test cases. |
|
Test Case Result Custom Field |
A Text Area field used by Test Cases where test results are added to a cumulative log. |
|
Test Case State Custom Field |
A select field used by Test Cases to indicate if the test is "In-Progress", "Passed", "Failed" or "Cant Test". |
|
Test Plan State Custom Field |
A read-only field used by Test Plans. This field is set automatically when a Test Plan is closed and displays the minimum Test Case State of all the Test Cases for the Test Plan. |
|
Test Suite Custom Field |
Used to group Test Cases into one or more Test Suites. |
synapseRT automatically creates the custom fields for you upon installation. But you can configure the plugin to use custom fields of your choice.
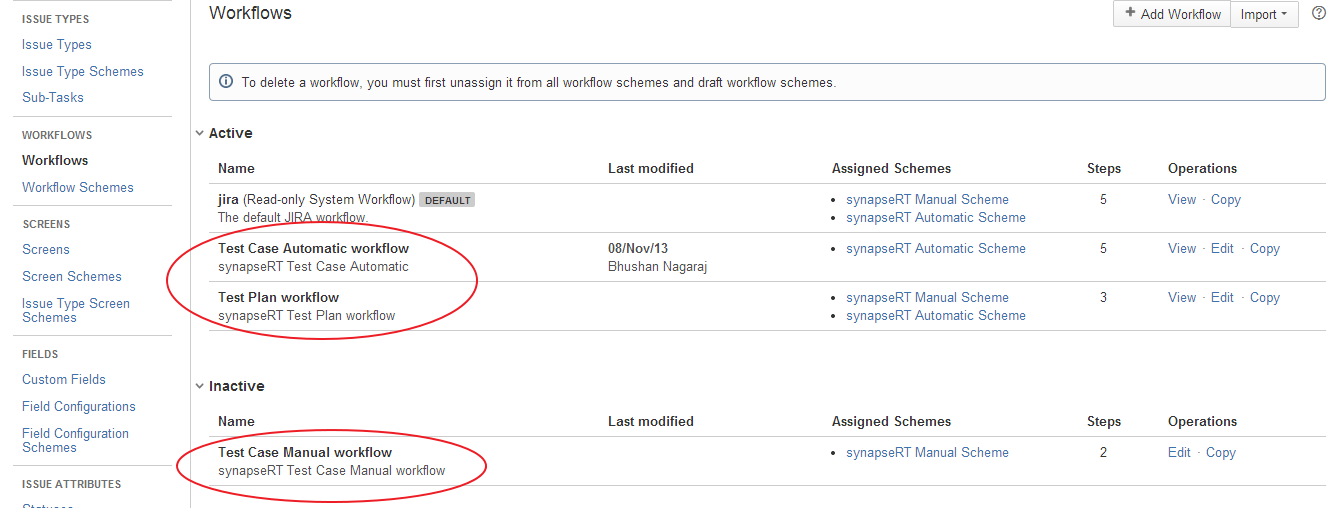
Workflow and Statuses
synapseRT plugin automatically creates workflows and statuses upon installation. Three statuses named "Can't Test", "Failed" and "Passed" are created. Take a look at the workflows that have been created by synapseRT.
-
Click on the COG icon on the top right corner of the page and choose "Issues". Select "Workflows" from the left menu bar.
Please review the Usage Guide to better understand how to manage test cases, requirements, and test suites within JIRA using Go2Group synapseRT.
Test Suites Management
Open the synapseRT Test Suites Management link in Administration->Add-ons to access the Test Suites Management panel.
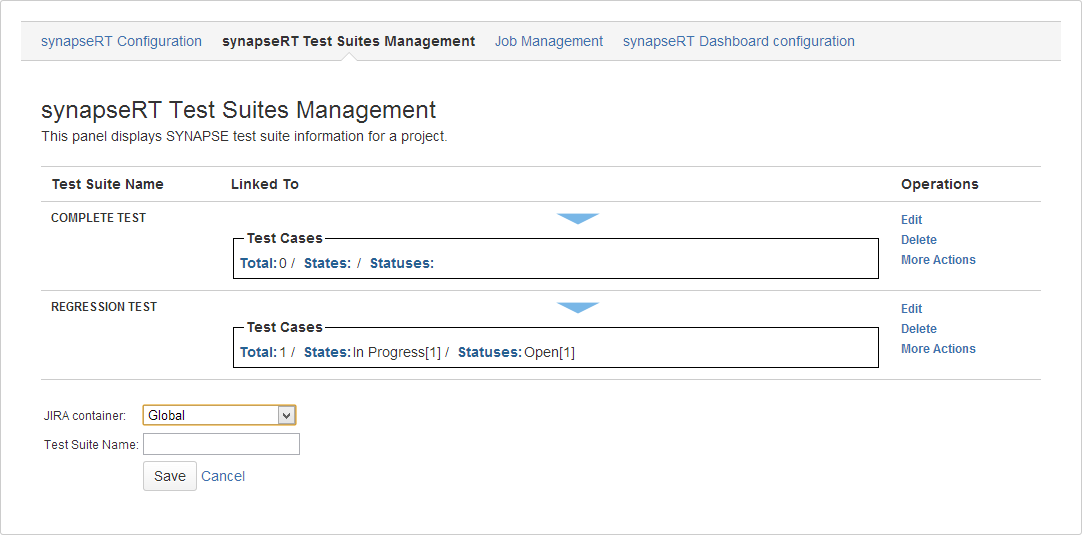
Test Suites Management panel allows you to operate with Test Suites and to see the lists of issues which are linked to the Test Suites. A synapseRT test suite can belong to one of three container types or scope.
|
Global |
Available to be linked to an issue in all Jira Projects. This is the default option. |
|---|---|
|
Project |
It allows you to make a test suite available only in the selected project. |
|
Category |
Available in those JIRA projects which are assigned to the project category. |
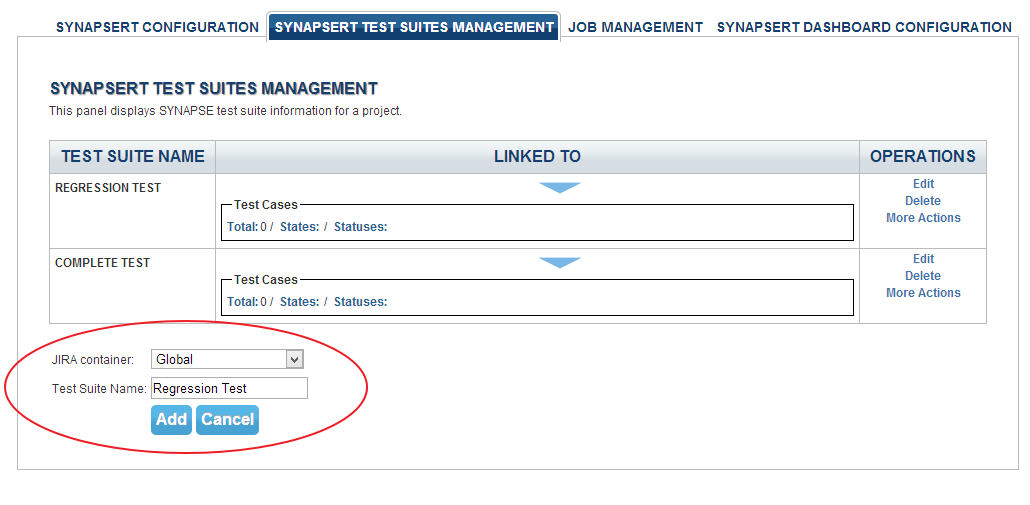
Adding a new test suite
-
To add a new test suite, select the container, enter a name and click "Add".
Edit/Delete a test suite
To edit/delete a test suite, click on "Edit" on the operations column of the test suite. The edit option allows you to rename the test suite.
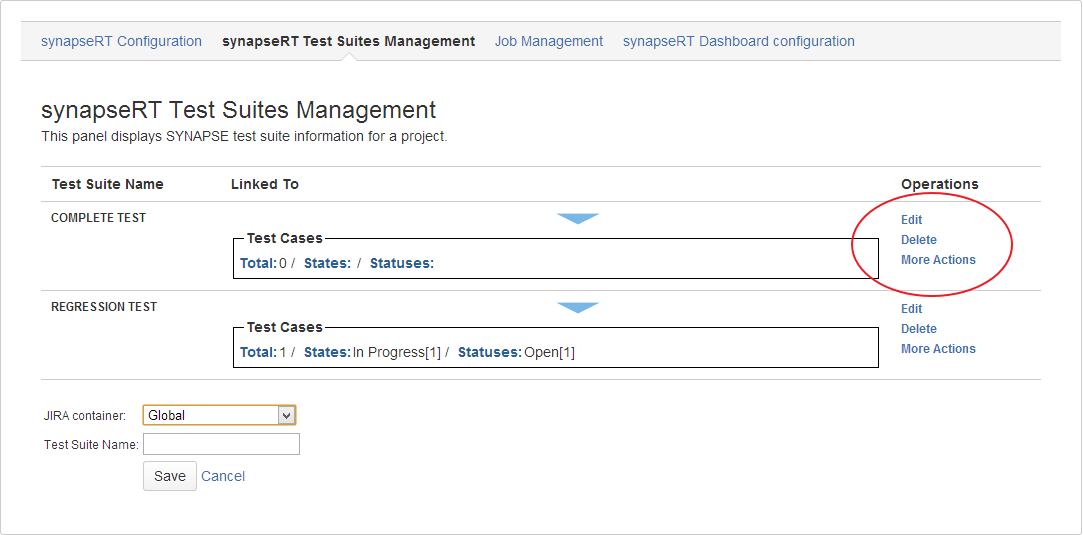
Merge/Split/Copy a test suite
Clicking on "More actions" in the Operations column of a test suite, allows you to Merge, Split or Copy a test suite.
|
Merge to |
Allows to merge the Test Suite to more inclusive Jira Container. |
|---|---|
|
Split to |
Allows to split the Test Suite to less inclusive Jira Container. |
|
Copy to |
Allows to copy the Test Suite to another Project. |
You can find more information about Test Suites in our Usage Guide in the Test Suites section .
Dashboard
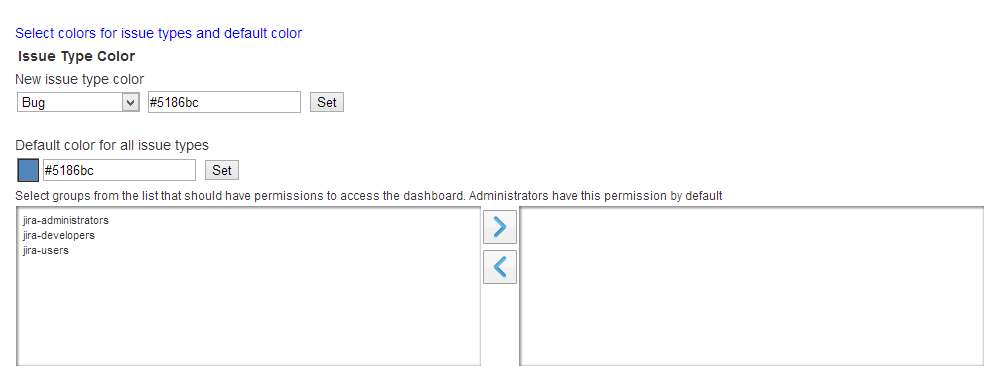
The Go2Group synapseRT dasboard is available for project administrators by default. You can also configure other JIRA groups to have access to the synapseRT dashboard. Take a look at the synapseRT Dashboard screenshot below.
|
Configuration options available |
Screenshots |
|---|---|
|
|
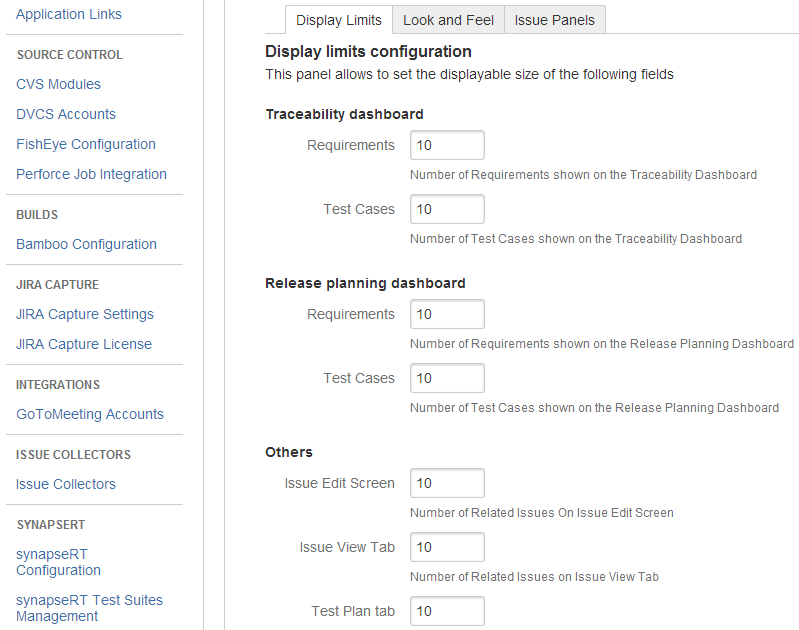
On this configuration screen we can configure plugin interface settings.
1. This parameter defines the maximal number of requirements for requirement tree level in Traceability matrix.
2. In this field you can specify which number of test cases will be displayed in the Traceability table.
3. and 4. define the number of issues which will be displayed in the Release Planning Dashboard.
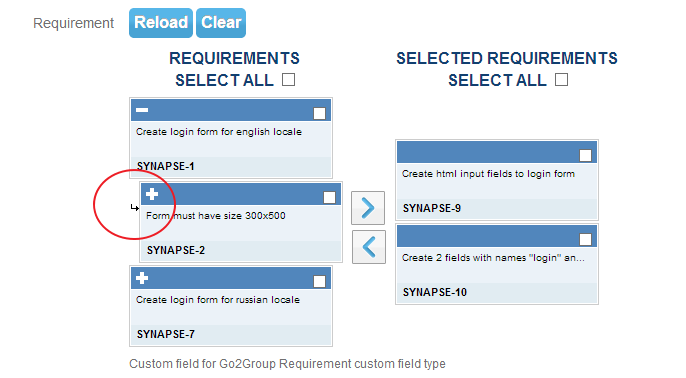
5. This parameter represent the number of issues which will be available on the minipages of custom fields. Image below show Requirement custom field for parameter value 1.
6. Here you can configure the number of issues on a tree level for requirement tree and the number of test cases that will be shown in issue tabs.
7.This field controls the number Test Plans to display on Test Plan project tab.
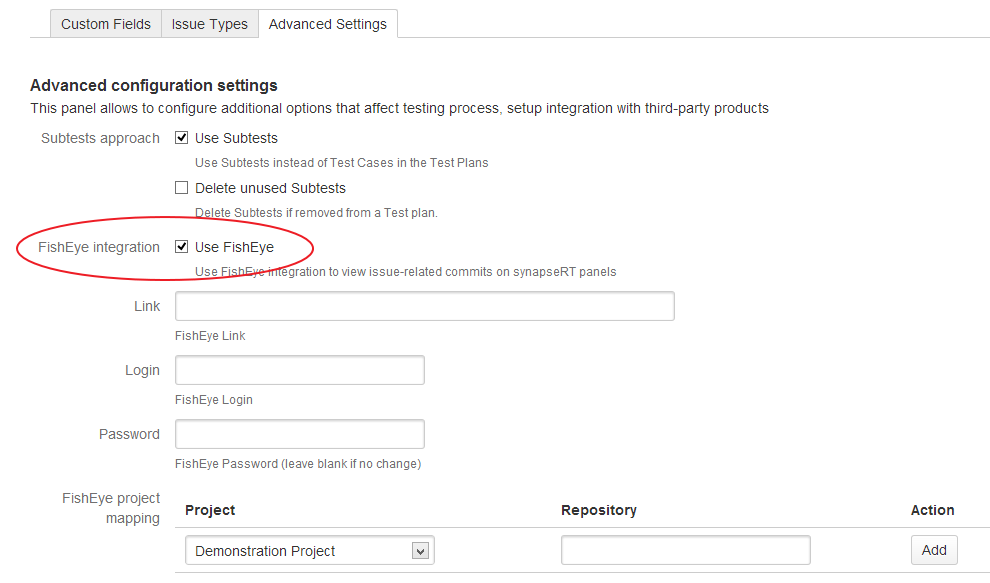
8. Check this option to enable synapseRT Fisheye integration. You can find more information about the configuration of Fisheye integration in the Fisheye section .
9. Mark this option if you want to enable extended mode for Test Case inrofmation blocks in the Test Suites Project tab (see corresponding Usage Guide for more information).
10. This option holds the list of Test Plans linked to a Test Case on Test Case State field so that the list will be always expanded (see corresponding Usage Guide section for more information).
11. If this option is checked then synapseRT will remove the test case Status information from all panels and tabs.
12. Enable this option to use Subtests in place of Test Cases in Test Plan management. This option also affects to the visibility of Create Bug option in More actions menu: the enabled feature hides the option from the menu of Test Cases.
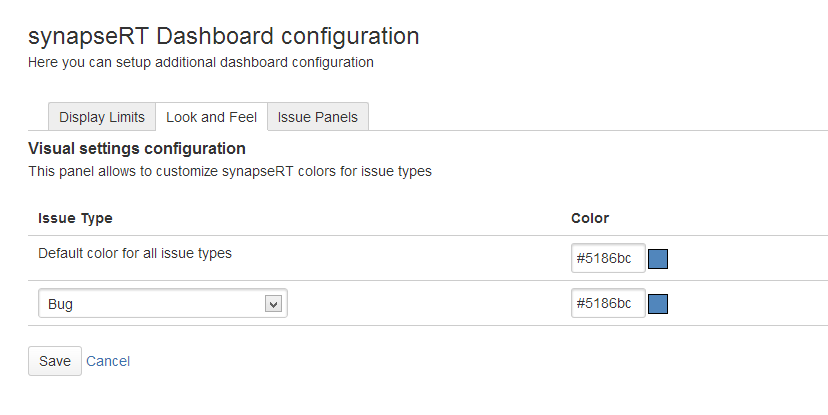
13. This option enables the simple design of issue items on synapseRT tabs, panels and custom fields, see images below:
Unknown Attachment

The users from the groups in the right list box have access to synapseRT dashboard. You can select groups in the left list box and grant them permission to access synapseRT dashboard by pressing the button at the bottom of the list box. To revoke granted permission select groups at the right list box and press the button at the bottom of the list box.
Test Case State Automation
synapseRT plugin comes bundled with a post-function and a screen to help you setup a post-function to change the state of a test case. Click here for information on setting up post-functions in your workflow. Click here for information on how to setup a screen for a transition in your workflow.
|
Post Function: Change synapseRT Test Case State field from custom list Unknown Attachment |
|
Screen: Synapse Test Case Results Automatic Screen Unknown Attachment |
The below screenshots show three screenshots. Screenshot (1) displays a new user transition that has been added to the workflow. Screenshot (2) displays the screen that has been added to the transition. Screenshot (3) displays the change in test case state and results.
|
Screenshot (1) |
|---|
|
Unknown Attachment |
|
Screenshot (2) |
|
Unknown Attachment |
|
Screenshot (3) |
|
Unknown Attachment |
Test plan workflow
This section belongs to the Test Plan section of the Usage manual. If you upgrade synapseRT from previous version, synapseRT will create Test Plan workflow and you have to assign this workflow to your workflow schemes.
Follow the steps below to update the workflow scheme.
-
Open Jira Administration section and follow the Workflows link. You will see that synapseRT Test Plan Workflow was created but now is inactive. Then open the Workflow Schemes link.
Unknown Attachment -
You will see existing workflow schemes. If the scheme which you want to change is active then you should disassociate projects from the scheme. In this example SYNAPSETEST Project associated to synapseRT Automatic Workflow Scheme. In this example we make the copy of active Workflow scheme, then associate Test Plan Workflow to new Scheme. Then we will associate the project from old scheme to new scheme. So copy Workflow Scheme.
Unknown Attachment -
Open the Workflows link.
Unknown Attachment -
Open the Assign a workflow link.
Unknown Attachment -
Assign Test Plan workflow to the scheme.
Unknown Attachment -
Now workflow assigned to the scheme. Come back to workflow schemes.
Unknown Attachment -
We will edit our scheme name to new. Then we will open associated project.
Unknown Attachment
Unknown Attachment
-
On the Project page open the More link in the Workflows section.
Unknown Attachment -
Open the Actions menu and choose the Use a different scheme option.
Unknown Attachment -
Choose new workflow scheme and press the Associate button.
Unknown Attachment -
Associate statuses from the old scheme to the new one.
Unknown Attachment
Unknown Attachment
-
After process is complete your workflow scheme with synapseRT Test Plan is active.
Unknown Attachment
FishEye integration
From Go2Group synapseRT v4.1 integration with Fisheye is available. You can map your Jira projects to Fisheye repositories during synapseRT configuration.
What's Needed
To successfully configure Go2Group synapseRT integration with Fisheye, you will need to verify that your Jira instance and FishEye + Crucible installation is configured and connected together according to the Atlassian Guide.
Configuration
-
Enable Fisheye Integration in the synapseRT Dashboard configuration page, select "Advanced Settings". Check the "Use Fisheye" option and click "Set".
-
Enter your fisheye connection parameters and click "Set".
-
Map Fisheye repositories to JIRA projects. See the Fisheye section of Usage Guide for more information.
Uninstallating synapseRT Plugin
-
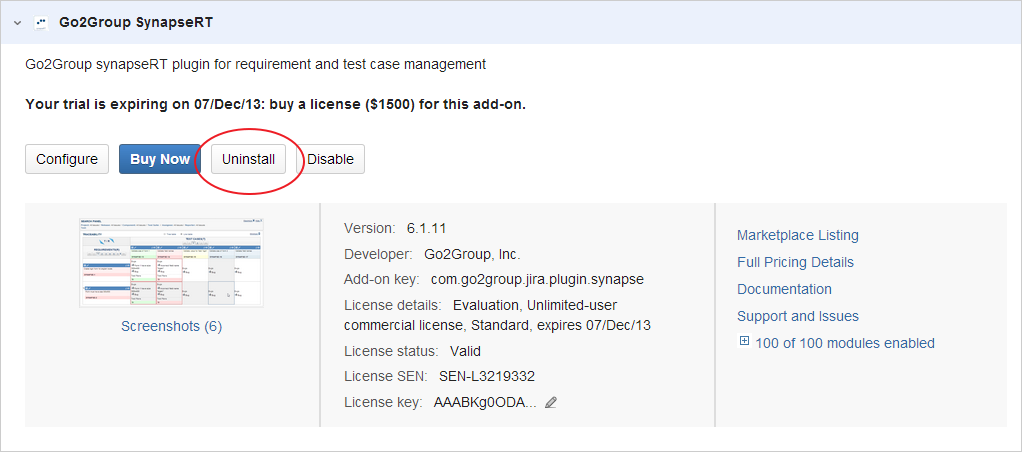
Click on the COG icon on the top right corner of the page and select Add-ons. Click on the "Manage add-ons" option on the left menu bar.
-
Locate the Go2Group synapseRT plugin in the list of installed plugins and click "Uninstall".
Tips and Troubleshooting
General Suggestions
Go2Group provides technical support for its entire line of products. If you run into any issues when installing or configuring the Go2Group Perforce Plugin for JIRA, please contact us.
Updates and Upgrades
Go2Group provides regular updates to its products. These updates include performance enhancements and minor bug fixes.
To review previous, current, and upcoming updates and upgrades, please visit the Go2Group support site.
Frequently Asked Questions
Go2Group provides an updated list of frequently asked questions.
Additional Information
Technical Support
Go2Group provides technical support for its entire line of products.
Go2Group technical support is available by telephone, email, and a specific customer support ticket system for the Perforce Plugin for JIRA:
-
By telephone: +1 877 442 4669
-
By email: support@Go2Group.com
-
By ticket:
jira.go2group.com
-
The support site above is self-administered - feel free to create and manage your account. For additional support information, please review our Perforce Plugin for JIRA support page.
-
Sales Support
Go2Group provides sales support for its entire line of products, including the Go2Group Perforce Plugin for JIRA.
Go2Group sales support is available by telephone and email:
-
By telephone: +1 877 442 4669
-
By email: sales@Go2Group.com
Learn More
For more information on Go2Group, its products, and its services, please visit our website at www.Go2Group.com.
For more information on JIRA, please visit the Atlassian website at www.Atlassian.com.